
SSL certificate is no more OPTIONAL. It not only helps in securing website, but also helps in winning customer trust and reputation for better search engine ranking. When we buy certificate lot’s of question strike our mind regarding installation. And when we start searching most of the online guides, it may lead to more CONFUSIONS? In this blog-post, I am trying to bring together, the easiest way to install SSL certificate. Believe me, you can do it by yourself without taking any outside help.
This installation process is suitable for cPanel/ Apache server and WordPress Website. If you are using other servers like Nginx, Tomcat, Microsoft Exchange server, Mac OS X server etc you may refer the guidelines provided by Server/SSL vendor or contact customer center who may install on your behalf.
There are three parts of this installation process:
- Obtain an SSL certificate
- Activate the certificate
- Migrate all resources from HTTP to HTTPS
PART-I: OBTAIN SSL CERTIFICATE
You can easily buy the certificate from popular SSL certificate providers. But do research before buying and look for a certificate issued by the trusted CA.
There are several types of certificates available. You can choose according to your business. The certificates are classified based on validation and number of domains you want to secure.
After purchase, you need to activate the certificate so that you can use it for your website.
PART-II: ACTIVATE THE CERTIFICATE
The certificates issued by CA come in a bundle package known as CRT bundle. The .crt file extension found in this bundle contains all the details browser /SSL protocol require to establish a secure connection.
But after purchase you will not directly get the certificate files to download, there is a validation process without which no CA can issue you a certificate. You need to apply for the certificate from client dashboard.
First, you need to submit CSR (Certificate Signing Request) to the CA’s so that they can validate your certificate. The CSR can be generated from your web server SSL manager. Let’s begin the process.
Go to the SSL/TLS Manager (found under security tab in cPanel dashboard)
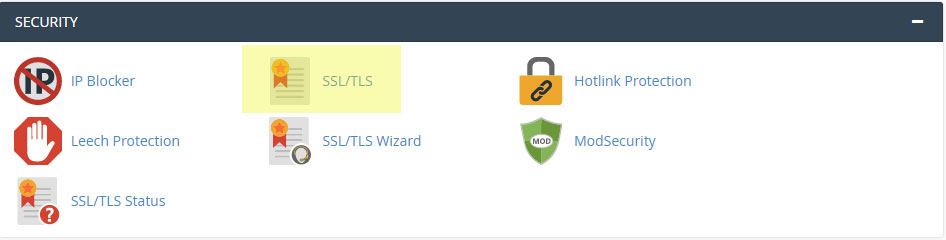
Select the option to generate private key
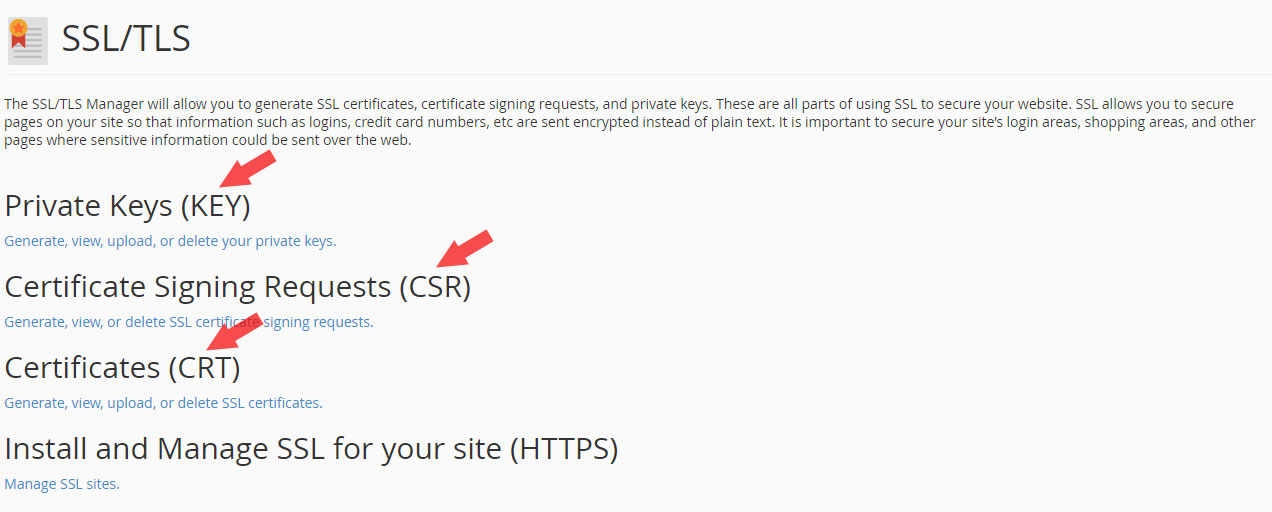
(Fig 1.1: SSL/TLS Manager)
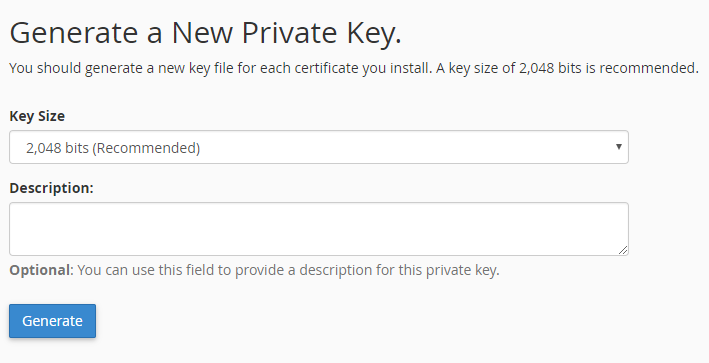
Generate the key using this form (select 2048 key bit length)
Return to SSL/TLS Manager.
Select next option to generate CSR
Refer Fig 1.1: SSL/TLS Manager
From the main window select your domain key and fill the form with requisite details
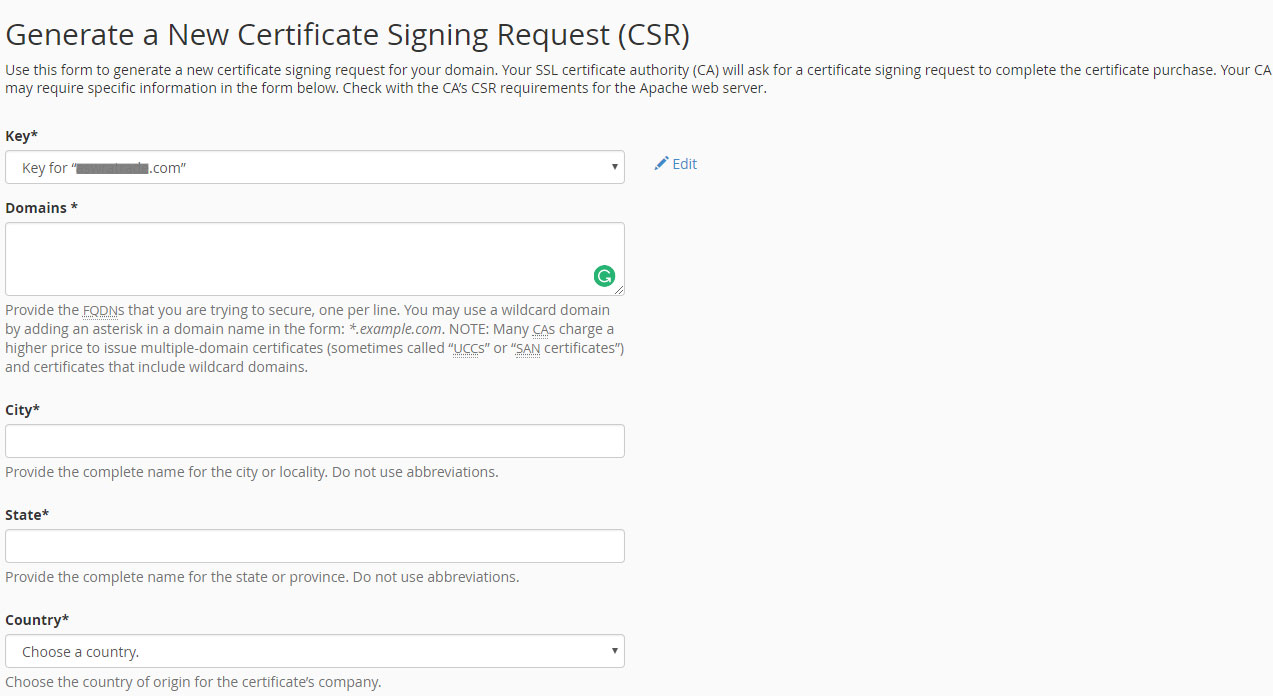
Copy the CSR codes and apply for certification through SSL vendor dashboard
The enrolment process will start. Based on the type of certificate chosen, the CA will start the validation process. Once the validation is complete you will get intimation through e-mail. This e-mail will contain CRT bundle, we talked earlier. You can also download certificate files from SSL vendor dashboard.
Upload/copy the downloaded .crt files in the Certificate (CRT) window of cPanel
Refer Fig 1.1: SSL/TLS Manager
Congratulations! you now know how to install SSL certificate. Few more steps left…
PART III: MIGRATE ALL RESOURCES FROM HTTP TO HTTPS
After acquiring HTTPS status now you need to update your URL to HTTPS so that all resources serve from a secure platform.
But before updating the URL in General Settings (WordPress Admin Dashboard) you need to do few exercises so that you can minimize mixed content warning that may come out after SSL and you will not be able to see the green lock pad icon in address bar.
To check, open the website after adding HTTPS in the existing URL. Then you need to go the developer console and check if any mixed content warning is shown by the browser. If it is there then you need to add the HTTPS before each image resource. If it is hosted externally then you need to host it on your site.
For JavaScript and CSS you need to check if the referenced source supports HTTPS or not. If not, you need to make some coding changes. Most of the problems you can resolve on your own.
After doing the exercise of serving all resources from HTTPS, you can move on to update the website URL to HTTPS.
Now, your site is secured but you also need to permanently redirect your users to the new web address. To do this you have to update the .htaccess file with 301 permanent redirection codes. If you are not comfortable with adding codes in WordPress files then you can download a free plugin from WordPress website.
Final Steps….
Let the search engine, social media, e-mail signature, your friends, and everybody know that you have acquired HTTPS status.
Some Troubleshooting Questions
The SSL is installed but padlock is not visible?
If SSL is installed successfully then you will be able to see your website using HTTPS in the URL. The green padlock doesn’t appear mainly due to the mixed content issue. Instead of the padlock, you will see this icon.![]() To resolve this you need to ensure that all site resources are served from HTTPS instead of the previous HTTP version.
To resolve this you need to ensure that all site resources are served from HTTPS instead of the previous HTTP version.
After SSL my site broke, I am upset what to do now?
Don’t worry it can be resolved, you just need to identify the probable reason. In most cases, the site deformation happens due to the previous cache stored by the system. First, you need to deactivate cache plugin and reactivate it again. This way site will come back to original state. The second reason could be the blocking of resources being called from a plugin. In that case, you need to deal with plugin individually. The third reason can be malfunctioning of any plugin. To resolve this, deactivate each plugin one by one and trace the faulty plugin.
Check the SSL manager if the certificate is installed properly. A good observation will surely help you eradicate the issue. Remember, if nothing works then you can restore the website from the backup file. You can also seek professional help to install SSL certificate.
If you find this article interesting, consider sharing with your friends.


